With the approaching deadline of Google Analytics Universal Analytics (UA) on July 1, 2023 it is evident that a lot of websites needs to migrate to Google Analytics 4 (GA4).
While searching the web lately for information about how to correctly implement GA4 in Next.js I found out that various articles provide different methods of adding Google Tag Manager (GTM) and Google Analtyics (GA4) to Next.js, and it's unclear what the easiest or right way to do it is.
This blog post aims to streamline the process by presenting a straightforward method to integrate GA4 using GTM in Next.js 13.
Setting Up Google Tag Manager and Google Analytics GA4 property
Before diving into the code, make sure you've set up your Google Tag Manager account. If you haven't yet, you can create one here. Make sure to copy your GTM ID (GTM-XXXXXXX).
You also need a Google Analytics GA4 property, you can create one in the Google Analytics admin. Be sure to create a Web stream and copy the Measurement ID (G-XXXXXXXXX).
Create tag in Google Tag Manager
Inside GTM, create a container if you don't have one already.
-
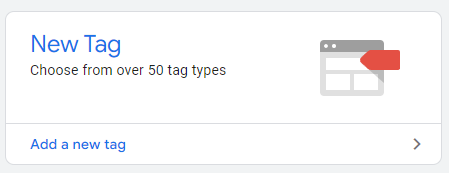
Click on the "New Tag" button:
-
Click "Choose a tag type to begin setup..."
-
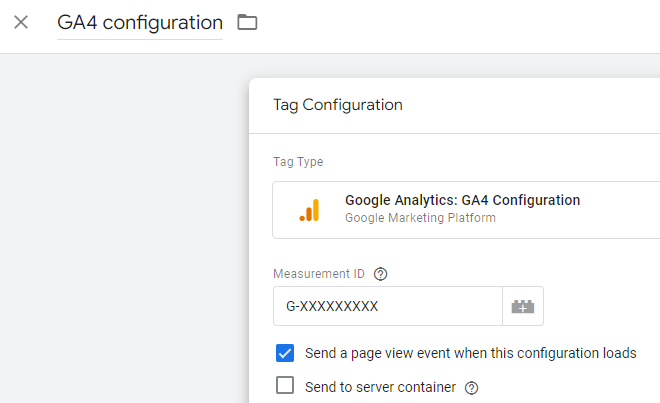
Select "Google Analytics: GA4 Configuration"
-
Fill in your Measurement ID and give your tag a name:
-
Click "Choose a trigger to make this tag fire..."
-
Select "All Pages"
-
Click "Save"
Embedding GTM in Your Next.js App
Next.js 13 uses a built-in Script component that allows you to control exactly when your scripts are loaded. We're going to use this to add the GTM script to our Next.js app.
First, let's add the GTM script in your app/layout.tsx file:
import Script from 'next/script'
const GTM_ID = 'GTM-XXXXXXX';

...

<html>
    <Script id="google-tag-manager" strategy="afterInteractive">
        {`
        (function(w,d,s,l,i){w[l]=w[l]||[];w[l].push({'gtm.start':
        new Date().getTime(),event:'gtm.js'});var f=d.getElementsByTagName(s)[0],
        j=d.createElement(s),dl=l!='dataLayer'?'&l='+l:'';j.async=true;j.src=
        'https://www.googletagmanager.com/gtm.js?id='+i+dl;f.parentNode.insertBefore(j,f);
        })(window,document,'script','dataLayer','${GTM_ID}');
        `}
    </Script>
    <body>
        ...
    </body>
</html>
Remember to replace the GTM_ID variable value 'GTM-XXXXXXX' with your own GTM ID.
In the case where JavaScript is disabled in the user's browser, you might want to add a noscript tag as well. This is optional, but it's a good practice for supporting non-JavaScript users. Add this above the closing body tag.
    ...
    <noscript
        dangerouslySetInnerHTML={{
        __html: `<iframe src="https://www.googletagmanager.com/ns.html?id=${GTM_ID}" height="0" width="0" style="display: none; visibility: hidden;"></iframe>`,
        }}
    />
    </body>
Loading Strategy
In the Script component, we've used the strategy prop with a value of "afterInteractive". This is the default value and it indicates that the script will fetch and execute after the page has loaded and become interactive. This is the point at which the browser has downloaded the necessary files and the website is ready for user interaction. This strategy is ideal for scripts like GTM and analytics that don't impact the initial render of the page.
Alternatively, if you have scripts that can wait to load during idle time, such as chat support or social media widgets, you can use the "lazyOnload" strategy. This strategy waits until the page is fully loaded and the browser is in idle time before running the script. This helps to ensure that these scripts don't slow down the initial page load for your users.
However, note that both the strategies use the browsers main thread, which will cause "Main Thread Blocking Time" in Google Page Speed. The strategy property only changes the timing when these scripts are loaded.
Is That It?
You might be surprised to find out that, yes, this is all you need to do.
Google Analytics 4 now has built-in tracking of certain user interactions, including pageviews and more. These features work seamlessly with Next.js, which means unless you have specific needs for measuring particular actions or behaviors, you don't need to set up additional things like a history change trigger.
GA4 Enhanced Event Measurement
One of the great features of Google Analytics 4 is the Enhanced Event Measurement. This feature automatically tracks certain types of user interactions. These interactions include, but are not limited to:
- Page views
- Scroll tracking
- Outbound click tracking
- Site search tracking
- Video engagement tracking
- File download tracking
- Form interaction tracking
By default, Enhanced Event Measurement is enabled in your GA4 property. To confirm or change this, navigate to the "Admin" settings of your GA4 property and select "Events". Here, you will see the "Enhanced measurement" option where you can toggle on or off individual types of interaction tracking.
Conclusion
And there you have it - a very simple but effective method for integrating Google Analytics 4 into your Next.js 13 application using Google Tag Manager. Hope you enjoyed it.